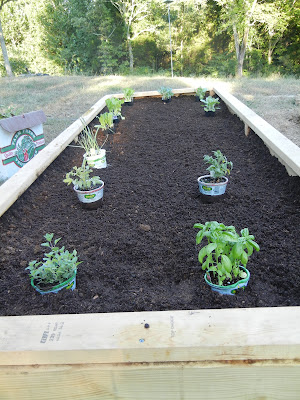
Here in Kentucky, the weather is nice but the soil is not. Our land consists of boulders mixed with rocks and boulders. Covered lightly with a deceiving layer of topsoil that makes you think you might actually be able to dig a hole. But don't kid yourself. You will hit a rock... and then another. Never fear... Raised beds are here!
 So, since we've got plenty of space for our garden and a whole lot of people to feed, we made ours pretty big. They are 4x12. We built the frame out of 2x12 boards. (For the clueless, that's 2 inches by 12 inches... you know, like a 2x4, but 12 instead of 4) The 12 foot boards are cheapest by the foot. So we just have Lowe's cut them to the sizes we needed. They usually do it for free, and it's nice coming home with the pieces ready to go.
There's lots of step-by-step tutorials online for building this, with lots more detail. I'm just going to give you the gist of what we did to inspire you and show you that it's not that hard to do.
To make one of these, you need:
sides:
2- 2x12x12ft
1-2x12x8, cut in half
corner and side braces:
1-2x4x10', cut into 8- 14" pieces, use 2 on each corner screwed together like a 4x4 post
ledge to sit on (optional):
2-2x4x12
1-2x4x8, cut ? , I need to go measure that...
deck screws, a drill and a hammer or something to pound the braces in with. They'll stick into the ground a couple of inches and be level with the top edge of the 2x12 board edges.
NOTE: *** Do not use pressure treated lumber for things that come in contact with food!***
The cost to build one of these is about 50 bucks, just lumber, not dirt.
 |
The hardest part for us was getting it level. That's really important.
The box on the left is done.
The one on the right is still deciding where it wants to be.
The problem is this little rock that's in the way...
OK, maybe it's a little bigger than we thought!
Dang! That's a big rock!
 |
| Go Elijah! |

We used a mixture of peat, manure and topsoil, also from Lowe's. If you have a truck, you can get this stuff a lot cheaper by going to the dirt store and buying it by the cubic yard. Next time we're building four boxes and will have the soil delivered.
There ya have it.
See? Pretty easy.
Now you're ready to start your garden.

That's a good feeling!
Oh, and remember, the size is totally up to you. You could build these 4x8, or 4x4 even easier. They would be easier to level, that's for sure. Just keep them 4 feet wide so you can reach in from both sides to the middle. The ledge is optional, but it is really nice to sit on while you're working.
We're getting ready to build a few more, next time I'll take better pictures of the steps. : )
I just wanted you to see that it's really not hard to do and doesn't need to be perfect. Outside projects are nice like that. It's better to build it imperfectly than not build it at all! Have fun. : )
Oh, and as always, feel free to leave a comment if you have any questions or if you notice that my instructions are totally screwed up and confusing. That happens sometimes. ; )
... But I'd still love to hear from ya! : ) ; ) : ) : P I'm on a roll with the smiley faces.


I would LOVE to have that little ledge to sit on to avoid the breaking of the back! I'm thinking strawberries!
ReplyDeleteStopped by your blog from Lori's. I am building some of these right now for our back yard. I was thinking 2x6 but I love your 2x12's! We have a large in the ground garden, these will be for strawberries and asparagus beds. I love the edge idea, especially for my strawberry bed!
ReplyDeleteGayly
Hi Gayly! Thanks for stopping by! Yeah, that ledge definitely makes it easier to work in there. I just bought some asparagus to plant, too. : )
Delete